
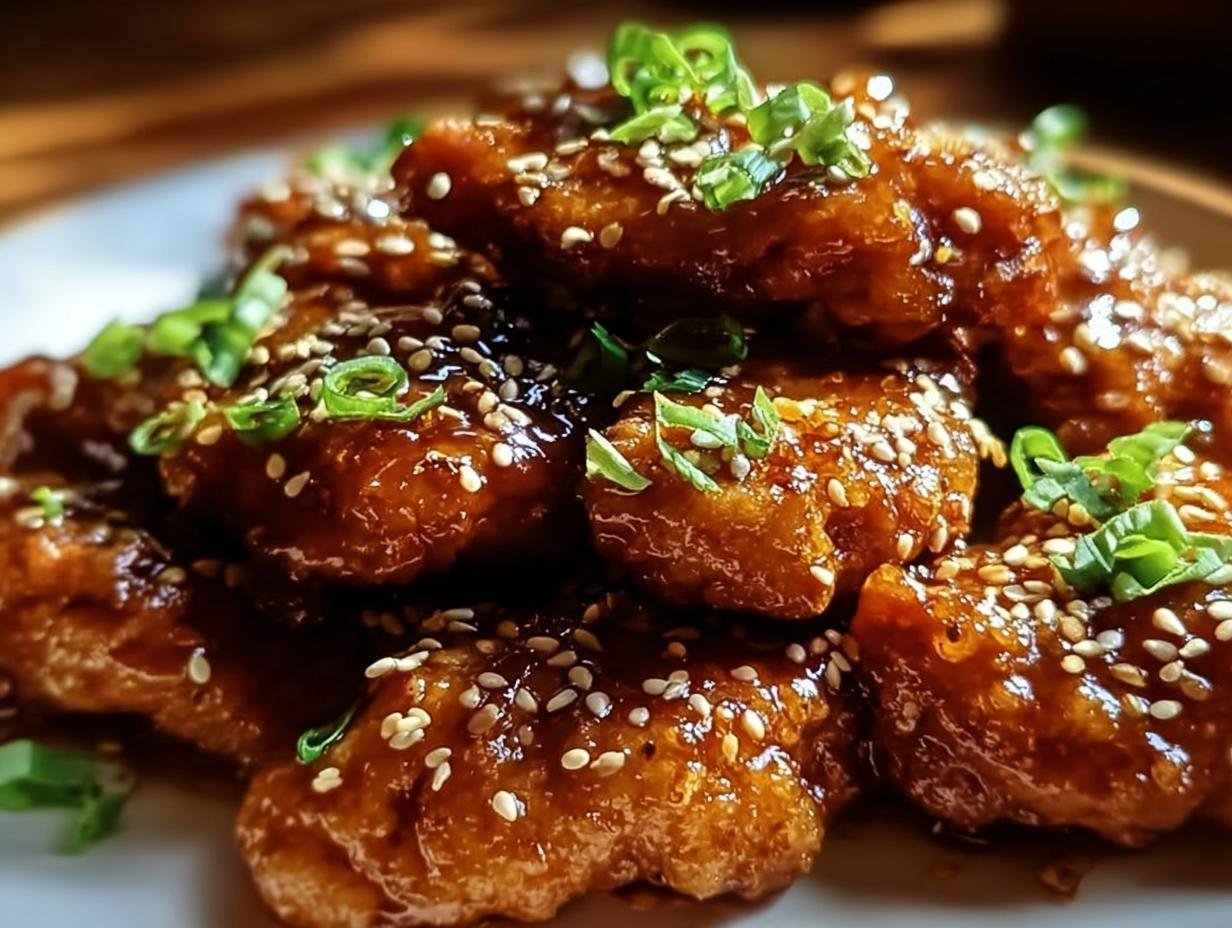
Korean Honey Butter Chicken has become my absolute go-to for a weeknight treat that feels incredibly special. I first tried this dish at a local Korean restaurant, and I was instantly hooked by that perfect balance of sweet honey and savory butter coating the most wonderfully crispy chicken. It’s the kind of flavor explosion that makes you close your eyes in delight! The crispy exterior giving way to a tender, juicy interior is pure magic. If you’re looking for an amazing Korean fried chicken honey butter recipe that’s surprisingly easy to make at home, you’ve come to the right place. Let’s dive into making this delicious Honey butter chicken Korean style!
Why You’ll Love This Korean Honey Butter Chicken
You’re going to adore this Korean Honey Butter Chicken for so many reasons:
- It boasts an irresistible sweet and savory flavor combination that’s truly addictive.
- The texture is simply divine – a perfectly crispy exterior meets a tender, juicy chicken interior.
- This is an incredibly easy Korean honey butter chicken recipe, perfect for busy nights.
- It’s a guaranteed crowd-pleaser, whether served as a main dish or a shareable appetizer.
- Its versatility shines, making it suitable for a casual family dinner or a party appetizer.
- You’ll find it’s surprisingly budget-friendly to make this delicious dish at home.
- It’s hands-down one of the best Korean honey butter chicken options you can whip up yourself.
Authentic Korean Honey Butter Chicken Ingredients
Gathering the right Korean honey butter chicken ingredients is the first step to nailing this delicious dish. You’ll need about 1 pound of chicken tenders, just make sure they’re patted completely dry for the best crisp. For the coating, we’ll use 1 cup of all-purpose flour, seasoned with 1 teaspoon garlic powder, 1 teaspoon onion powder, 1 teaspoon paprika, 1/2 teaspoon salt, and 1/2 teaspoon black pepper. The wet dredge is simple: 1 large egg whisked with 1/2 cup buttermilk. Then comes the crucial crispiness from 1 cup of panko bread crumbs. For frying, you’ll need a neutral oil like vegetable oil. The star of the show, the glaze, requires 1/2 cup unsalted butter, 1/2 cup honey for that signature sweetness, and 1 tablespoon soy sauce to add a lovely umami depth. Optional garnishes include 1 teaspoon sesame seeds and chopped green onions.
How to Make Korean Honey Butter Chicken
Ready to master the art of Korean honey butter chicken instructions? It’s a straightforward process that guarantees amazing results. My approach to Korean chicken honey butter preparation starts with getting all my ingredients ready before I even touch the chicken. This makes the whole experience so much smoother and more enjoyable. Let’s break down how to make Korean honey butter chicken step-by-step so you can recreate this delicious dish in your own kitchen.
Step 1: Breading the Chicken
First, I like to set up a little breading station. Pat your chicken tenders completely dry with paper towels – this is crucial for getting that super crispy coating. In one shallow dish, I mix my flour with all the seasonings. In a second dish, I whisk together the egg and buttermilk. The third dish gets filled with those glorious panko bread crumbs. Now, take each chicken tender and coat it thoroughly in the seasoned flour, shaking off any excess. Then, dip it into the egg mixture, letting any extra drip off, and finally, press it firmly into the panko bread crumbs. Make sure every inch is covered for maximum crispiness!
Step 2: Frying the Chicken
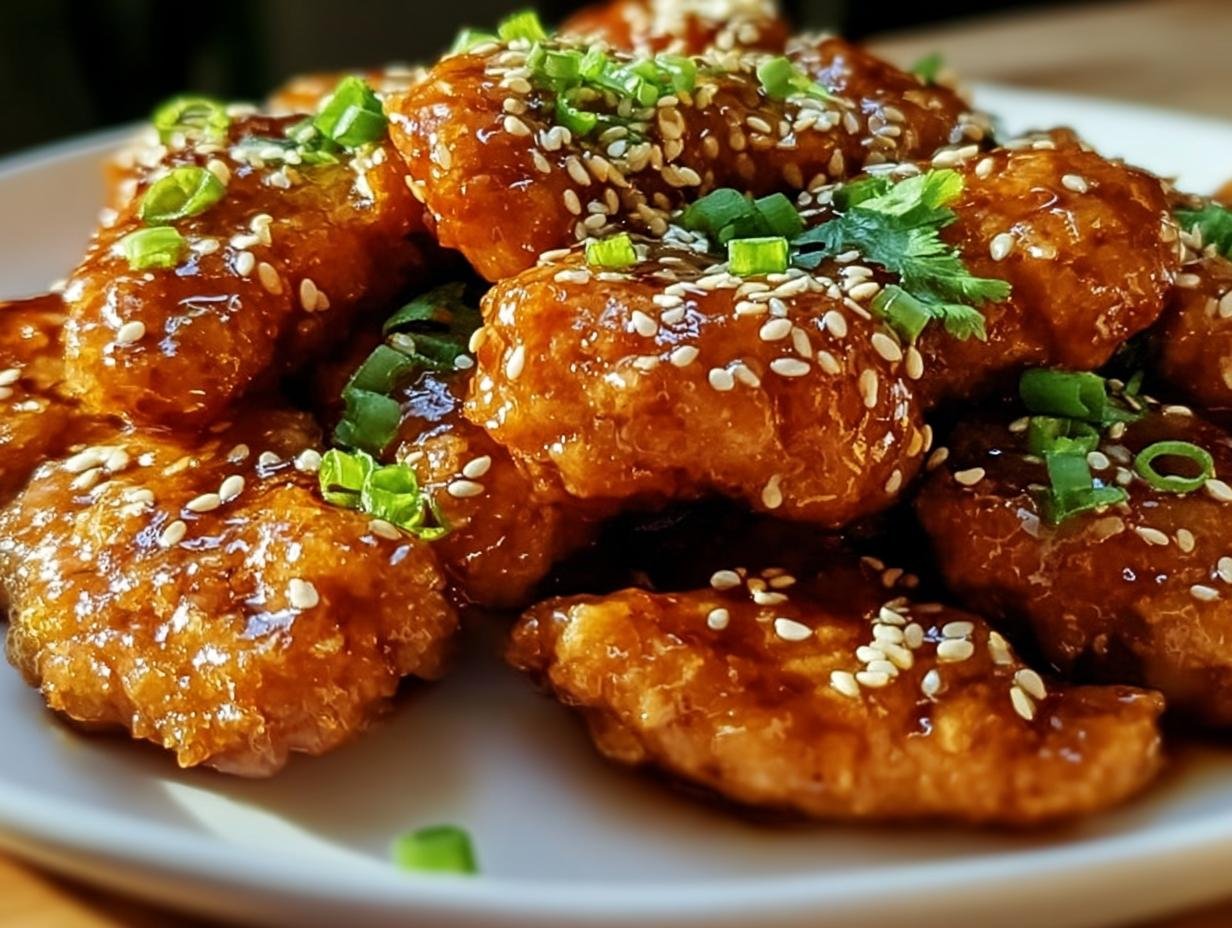
For frying, I heat about an inch of vegetable oil in a large skillet over medium heat. You want the oil to be hot enough that a breadcrumb dropped in sizzles immediately, usually around 350°F (175°C). Carefully place the breaded chicken tenders into the hot oil, being careful not to overcrowd the pan. Cooking in batches is key to maintaining the oil’s temperature and ensuring each piece fries up perfectly golden brown and crispy. Fry for about 5-7 minutes per side, or until the chicken is cooked through and has a beautiful, golden crust.
Step 3: Making the Honey Butter Glaze
While the chicken is frying (or after it’s done), it’s time to whip up the magical glaze. In a small saucepan over low heat, I melt the unsalted butter. Once it’s completely liquid, I stir in the honey and soy sauce. Keep stirring gently until everything is smooth and well combined. This creates that signature sweet, savory, and slightly umami flavor profile that makes this dish so irresistible. You can stir in sesame seeds at this point if you like, for a little extra texture and nuttiness. For more information on creating delicious sauces, check out our guide on homemade tomato sauce.
Step 4: Glazing and Serving
Once your chicken tenders are fried to perfection and drained on paper towels, it’s time for the grand finale. Gently place the hot, crispy chicken tenders into the saucepan with the warm honey butter sauce. Toss them carefully to ensure each piece is generously coated in that luscious glaze. Serve immediately, garnished with chopped green onions or extra sesame seeds if you’re feeling fancy. The contrast of the hot, crispy, glazed chicken is absolutely divine! This dish pairs wonderfully with a simple caprese salad for a balanced meal.

Pro Tips for the Best Korean Honey Butter Chicken
To ensure your homemade Korean Honey Butter Chicken is absolutely perfect, here are a few tips I’ve picked up:
- Always make sure your chicken tenders are completely dry before breading. Moisture is the enemy of crispiness!
- Resist the urge to overcrowch the pan when frying. Cooking in batches ensures the oil stays hot and the chicken gets nice and crispy.
- Using good quality honey really makes a difference in the final flavor of the glaze. For more on ingredient quality, see our piece on the many benefits of onions.
- Don’t be afraid to adjust the amount of honey to suit your sweetness preference.
- Fresh ingredients, especially the chicken, will always yield the tastiest results.
What’s the secret to perfect Korean honey butter chicken?
For truly authentic Korean honey butter chicken, the secret is a two-fold approach: meticulously dry chicken for maximum crispiness, and ensuring the honey butter sauce is warm, not piping hot, when you toss the fried chicken. This prevents the coating from getting soggy and keeps that delightful crunch intact.
Can I make Korean Honey Butter Chicken ahead of time?
You can prepare components ahead of time, like making the honey butter sauce and storing it in an airtight container in the fridge, or having your breading station ready. However, for the best texture, I highly recommend frying the chicken just before serving. The crispiness is truly best when fresh! If you’re looking for other make-ahead meal ideas, consider our mediterranean chickpea salad.
How do I avoid common mistakes with Korean Honey Butter Chicken?
The most common pitfalls are ending up with soggy chicken or a burnt sauce. To avoid soggy chicken, ensure it’s thoroughly dry before breading and don’t overcrowd the frying pan. For the sauce, keep the heat low and stir constantly to prevent the honey from burning, which can make it bitter. Learning about proper cooking temperatures is crucial, much like when preparing cooked sea bream fish.
Best Ways to Serve Korean Honey Butter Chicken
This Korean chicken recipe honey butter flavor is so versatile! It’s absolutely delicious served hot right after glazing. For a complete meal, I love pairing it with fluffy steamed white rice to soak up any extra glaze. Pickled radishes, or danmuji, are a classic Korean side that offers a refreshing, tangy contrast to the sweet chicken. If you prefer something cooler, a simple, lightly dressed coleslaw also works wonderfully. It’s a fantastic way to balance the rich, savory, and sweet notes of the chicken.
Variations of Korean Honey Butter Chicken
While this classic Korean Honey Butter Chicken is amazing on its own, you can totally switch things up! For a delightful spicy kick, try making Gochujang honey butter chicken by adding a tablespoon or two of gochujang (Korean chili paste) to the glaze. If you’re a garlic lover, a Garlic honey butter Korean chicken is fantastic – just double the garlic powder in the breading and add a minced clove of garlic to the glaze as it warms. For a healthier approach, you can bake the breaded chicken tenders at 400°F (200°C) until golden and cooked through, then toss them in the warm glaze. You can also swap chicken tenders for boneless, skinless chicken thighs or even chicken breast chunks for different textures and cooking times.
Nutrition Facts for Korean Honey Butter Chicken
When you’re enjoying this delicious dish, it’s helpful to know the nutritional breakdown. Here’s a look at the estimates per serving:
- Calories: 450 kcal
- Fat: 25g
- Protein: 25g
Keep in mind that the exact amounts of sugar and sodium can vary significantly depending on the specific brands of honey and soy sauce you use in your Korean fried chicken honey butter sauce. Nutritional values are estimates and depend on preparation and the specific ingredients you choose to make your Korean Honey Butter Chicken.
How to Store and Reheat Korean Honey Butter Chicken
To keep your delicious Korean Honey Butter Chicken tasting its best, proper storage is key. First, let the chicken cool completely at room temperature. Then, store any leftovers in an airtight container in the refrigerator for up to 2 to 3 days. I’ve found that freezing the glazed chicken can make it a bit soggy upon reheating, so I generally avoid that. If you have extra Korean fried chicken honey butter sauce, you can store that separately in its own container. When you’re ready to enjoy them again, the best way to reheat is in a preheated oven at 375°F (190°C) for about 8-10 minutes, or in an air fryer to help restore that wonderful crispiness. Avoid the microwave if you want to maintain the texture!
Frequently Asked Questions About Korean Honey Butter Chicken
What is Korean honey butter chicken?
Korean honey butter chicken is a popular dish that combines the crispy texture of Korean fried chicken with a rich, sweet, and savory glaze made from honey, butter, and soy sauce. It’s a perfect example of fusion cuisine, balancing indulgent flavors with satisfying crunch. Many people seek out a good Korean fried chicken honey butter recipe to recreate this delicious taste at home.
Can I use chicken thighs instead of tenders?
Absolutely! Chicken thighs are a fantastic alternative to tenders for this recipe. They tend to be even more tender and hold up well to frying. You’ll just need to adjust the cooking time slightly, as thighs might take a few minutes longer to cook through. Just ensure they are well-coated and fried until golden brown and cooked to an internal temperature of 165°F (74°C).
How spicy is this dish?
This classic Korean Honey Butter Chicken recipe is not spicy at all. The flavor profile is primarily sweet and savory, with a rich buttery undertone. If you enjoy a bit of heat, however, you can easily add a touch of gochugaru (Korean chili flakes) or some gochujang to the honey butter sauce to create a spicy-sweet variation.
What can I use instead of panko bread crumbs?
If you don’t have panko bread crumbs, you have a few good options! Regular bread crumbs will work, though they might not provide quite the same level of crispiness. You could also try crushed cornflakes or even finely crushed saltine crackers for a unique crunchy coating. Whichever you choose, make sure the chicken is well-coated for the best texture. For more baking tips, explore our guide on pistachio pavlova meringue cakes.
PrintKorean Honey Butter Chicken: Amazing Flavor

Korean Honey Butter Chicken Tenders offer a delightful fusion of crispy chicken with a sweet and savory honey butter glaze, perfect for any occasion.
- Prep Time: 20 minutes
- Cook Time: 15-20 minutes
- Total Time: 35-40 minutes
- Yield: 4 servings 1x
- Category: Dinner, Appetizer
- Method: Frying
- Cuisine: Korean
- Diet: Vegetarian
Ingredients
- 1 pound chicken tenders
- 1 cup all-purpose flour
- 1 teaspoon garlic powder
- 1 teaspoon onion powder
- 1 teaspoon paprika
- 1/2 teaspoon salt
- 1/2 teaspoon black pepper
- 1 large egg
- 1/2 cup buttermilk
- 1 cup panko bread crumbs
- Vegetable oil, for frying
- 1/2 cup unsalted butter
- 1/2 cup honey
- 1 tablespoon soy sauce
- 1 teaspoon sesame seeds (optional)
- Chopped green onions for garnish (optional)
Instructions
- Pat dry the chicken tenders with a paper towel.
- In a bowl, mix flour, garlic powder, onion powder, paprika, salt, and pepper.
- In a separate bowl, whisk together the egg and buttermilk. In another bowl, place the panko bread crumbs.
- Dip each chicken tender first in the flour mixture, then into the egg mixture, and finally coat with panko bread crumbs. Ensure they are well coated.
- In a large skillet, heat vegetable oil over medium heat. Ensure there’s enough oil to cover the bottom of the pan.
- Once the oil is hot, add chicken tenders to the skillet. Fry until golden brown and cooked through, about 5-7 minutes on each side.
- In a small saucepan, melt butter over low heat. Add honey and soy sauce, stirring until fully combined and smooth.
- Once the chicken tenders are cooked, remove them from the skillet and place them on a paper towel-lined plate to drain excess oil. Pour the honey butter sauce over the tenders and toss gently to coat.
- Sprinkle with sesame seeds and chopped green onions for added flavor and presentation.
Notes
- Use fresh chicken tenders for the best flavor.
- Marinate chicken for extra flavor.
- Adjust honey amount to your preference.
- Experiment with additional spices in the breading.
- Cook in batches to ensure even frying and crispiness.
- For a healthier option, bake at 400°F until golden brown.
Nutrition
- Serving Size: 4 servings
- Calories: 450 kcal
- Sugar: N/A
- Sodium: N/A
- Fat: 25g
- Saturated Fat: N/A
- Unsaturated Fat: N/A
- Trans Fat: N/A
- Carbohydrates: N/A
- Fiber: N/A
- Protein: 25g
- Cholesterol: N/A


Leave a Reply